

Introduction
Sandwiches have long been a beloved culinary staple around the world, cherished for their versatility and ease of preparation. From classic ham and cheese to gourmet creations, sandwiches cater to every palate, making them a go-to meal for breakfast, lunch, dinner, or even a midnight snack. One particularly indulgent variation is the Cheesy Chicken Garlic Bread Sandwich, which takes the ordinary sandwich experience to a whole new level.
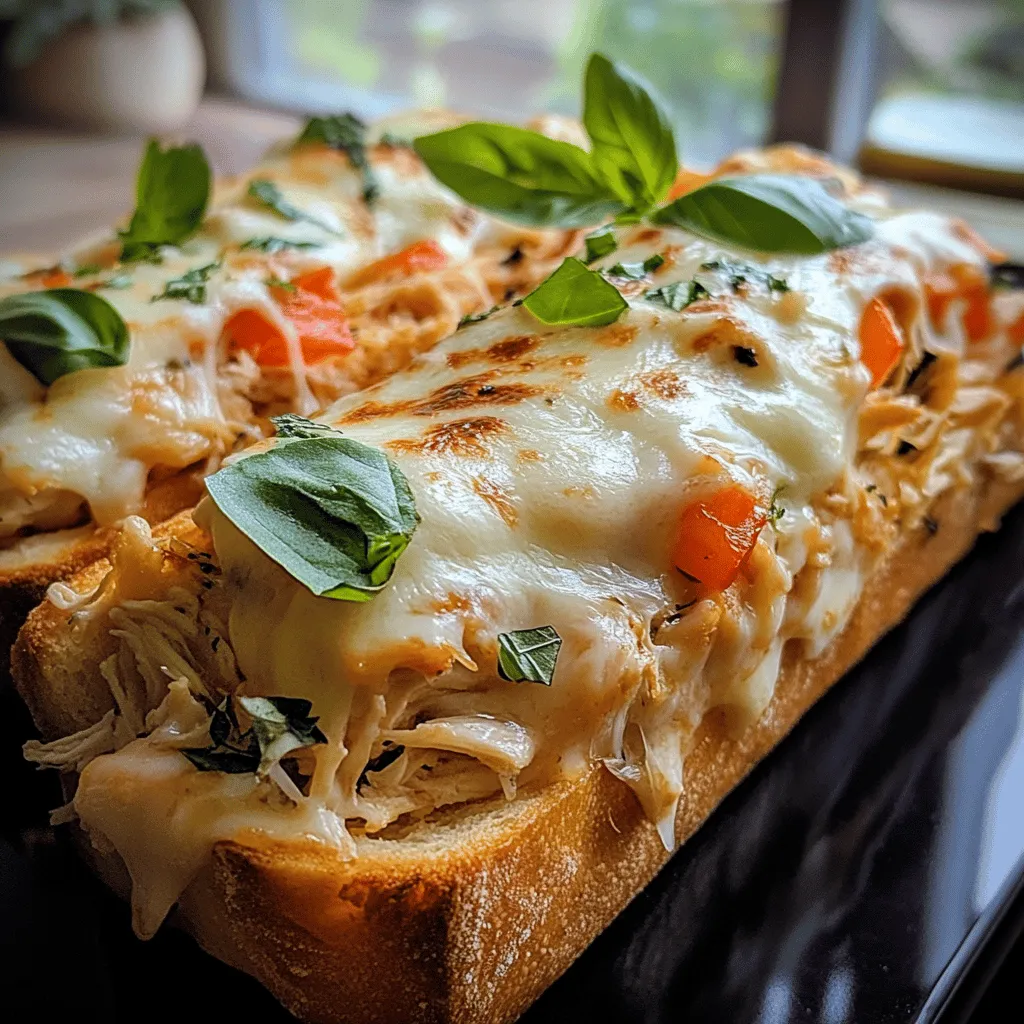
Imagine biting into a crispy, golden slice of garlic bread enveloping a warm and creamy chicken filling, punctuated by gooey melted cheese. This sandwich is not just a meal; it’s an experience that brings together a perfect balance of flavors and textures. The rich, savory taste of the chicken combined with aromatic garlic and the satisfying crunch of the bread creates a delightful dish that will leave you craving more.
In this article, we’ll dive into the details of this delicious Cheesy Chicken Garlic Bread Sandwich, exploring the essential ingredients that make it so special and walking you through the preparation steps to ensure your sandwich turns out perfect every time.
Understanding the Ingredients
To create the ultimate Cheesy Chicken Garlic Bread Sandwich, it’s crucial to understand the role of each ingredient in the recipe. Each component contributes to the overall flavor, texture, and satisfaction of the dish.
Garlic Bread
Garlic bread is the star of this sandwich, providing a crunchy exterior that contrasts beautifully with the creamy filling. When it comes to garlic bread, you have two main options: store-bought or homemade. Store-bought garlic bread can save time and effort, but nothing beats the fresh taste of homemade garlic bread. If you opt to make your own, you can control the amount of garlic and butter, ensuring that it meets your taste preferences. Simply mix softened butter with minced garlic, spread it on your favorite bread, and toast it until golden.
Cooked Chicken
For the filling, cooked chicken is a must. While you can use any type of chicken, grilled or rotisserie chicken is ideal for this recipe. Grilled chicken provides a smoky flavor that complements the other ingredients, while rotisserie chicken offers convenience and tenderness. Both options are packed with protein, making this sandwich not only delicious but also satisfying. When using pre-cooked chicken, simply shred it into bite-sized pieces for easy incorporation into the filling.
Cheese Selection
The choice of cheese can make or break your sandwich. In this recipe, mozzarella cheese is the star player. With its excellent melting properties, mozzarella creates that gooey, stretchy texture we all love in a sandwich. Its mild flavor allows the other ingredients to shine while enhancing the overall richness of the filling. For an extra kick, consider mixing in some cheddar or pepper jack cheese to add depth and complexity to the flavor profile.
Sautéed Bell Peppers and Onions
To elevate the flavor and texture of your Cheesy Chicken Garlic Bread Sandwich, the addition of sautéed bell peppers and onions is key. These vegetables not only provide a lovely sweetness and crunch but also contribute vibrant colors to your sandwich. Sauté them in a bit of olive oil until they are tender and caramelized, which will enhance their natural sweetness and add a wonderful depth of flavor.
Cream Cheese
Cream cheese is the secret ingredient that binds the filling together, adding a luscious creaminess that makes each bite irresistible. It creates a rich, velvety texture that complements the chicken and vegetables beautifully. Opt for plain cream cheese for a neutral flavor, or consider using a flavored variety, like garlic and herb, for an extra layer of taste.
Spices and Seasonings
To elevate the flavors in your Cheesy Chicken Garlic Bread Sandwich, the right spices and seasonings are essential. Garlic powder is a must, as it enhances the garlic flavor in the bread while tying everything together. Italian seasoning, a blend of herbs like oregano, basil, and thyme, adds an aromatic touch that evokes the flavors of classic Italian cuisine. A sprinkle of salt and black pepper will help to balance the flavors and bring out the best in each ingredient.
Fresh Basil
Finally, fresh basil is the perfect finishing touch for your sandwich. Not only does it add a pop of color, but its aromatic flavor will brighten up the dish and provide a delightful contrast to the richness of the filling. Simply chop the basil leaves and sprinkle them on top of the sandwich before serving for a fresh, herbal note that enhances the overall experience.
Preparation Steps for the Cheesy Chicken Garlic Bread Sandwich
Now that we’ve covered the essential ingredients, let’s dive into the preparation steps to create this mouthwatering Cheesy Chicken Garlic Bread Sandwich.
Prepping the Ingredients
Before you start cooking, it’s important to gather and prepare all your ingredients. This will streamline the cooking process and ensure that everything comes together smoothly.
1. Gather Your Ingredients: Start by ensuring you have all the ingredients on hand: garlic bread (store-bought or homemade), cooked chicken (grilled or rotisserie), mozzarella cheese, cream cheese, sautéed bell peppers and onions, garlic powder, Italian seasoning, salt, black pepper, and fresh basil.
2. Cook the Vegetables: If you haven’t prepared the sautéed bell peppers and onions, do so now. Heat a tablespoon of olive oil in a skillet over medium heat. Add sliced bell peppers and onions, seasoning them with a pinch of salt and pepper. Sauté until they are tender and slightly caramelized, about 5-7 minutes. Set aside to cool slightly.
3. Shred the Chicken: If you are using grilled or rotisserie chicken, shred the meat into bite-sized pieces. This will help it mix well with the other ingredients and ensure that every bite of your sandwich is flavorful.
4. Mix the Filling: In a mixing bowl, combine the shredded chicken, sautéed vegetables, cream cheese, mozzarella cheese, garlic powder, Italian seasoning, salt, and pepper. Stir until everything is well incorporated, ensuring that the chicken and vegetables are evenly coated with the creamy mixture.
How to Prepare the Chicken if Not Using Pre-Cooked Options
If you decide to use raw chicken instead of pre-cooked options, follow these steps to ensure it’s cooked safely and deliciously:
1. Choose the Right Cut: Boneless, skinless chicken breasts or thighs work best for this recipe. They are quick to cook and easy to shred.
2. Season the Chicken: Before cooking, season the chicken with salt, pepper, and a sprinkle of garlic powder. This will infuse flavor into the meat as it cooks.
3. Cook the Chicken: Heat a tablespoon of olive oil in a skillet over medium-high heat. Add the seasoned chicken and cook for about 6-7 minutes on each side, or until the internal temperature reaches 165°F (75°C). The chicken should be golden brown and cooked through.
4. Shred the Chicken: Allow the cooked chicken to rest for a few minutes before shredding it using two forks. This allows the juices to redistribute, keeping the meat tender and juicy.
5. Combine with Other Ingredients: Once shredded, follow the same steps as before to mix the chicken with the sautéed vegetables, cream cheese, mozzarella cheese, and seasonings.
With all the ingredients prepped and ready, you’re just a few steps away from crafting the Cheesy Chicken Garlic Bread Sandwich of your dreams. The next section will guide you through the assembly and cooking process, ensuring that your sandwich turns out perfectly every time.

Step-by-Step Guide on Sautéing Bell Peppers and Onions for Optimal Flavor
To bring out the best flavor in your Cheesy Chicken Garlic Bread Sandwich, properly sautéing the bell peppers and onions is essential. Start by selecting fresh, vibrant bell peppers—red, yellow, or green—depending on your preference for sweetness. Slice them into thin strips along with a medium-sized onion.
1. Heat the Pan: Begin by heating a tablespoon of olive oil in a large skillet over medium heat. Olive oil not only adds flavor but also helps to prevent sticking.
2. Add Onions First: Once the oil is shimmering, add the sliced onions to the pan. Sauté them for about 2-3 minutes until they start to soften and become translucent. This initial step allows the sugars in the onions to caramelize, enhancing their sweetness.
3. Incorporate Bell Peppers: Next, add the sliced bell peppers to the pan. Stir well to combine with the onions. Sauté for another 5-7 minutes until the peppers are tender and slightly charred. This combination provides a delicious base for your filling.
4. Season Wisely: Season the mixture with a pinch of salt and pepper. You can also add a sprinkle of garlic powder or Italian seasoning for an extra flavor boost. Once cooked, set the sautéed vegetables aside to cool slightly before adding them to your filling mixture.
Mixing the Filling
Now that your vegetables are ready, it’s time to create a cohesive filling that will elevate your sandwich. In a mixing bowl, combine the sautéed bell peppers and onions with the cooked chicken and cheese.
1. Combine the Ingredients: In a large mixing bowl, add your shredded or chopped cooked chicken. This can be rotisserie chicken, grilled chicken, or any leftover chicken you have. Measure one cup of sautéed vegetables and add them to the bowl.
2. Add Cheese: Incorporate one cup of shredded cheese into the mixture. Mozzarella and cheddar are popular choices for their melting properties and flavor, but feel free to explore different cheese options based on your taste preferences.
3. Blend and Season: Mix the ingredients thoroughly with a spatula or spoon. Add salt, pepper, and any additional spices you enjoy, such as red pepper flakes for heat or fresh herbs for a burst of freshness. For added creaminess, consider mixing in a few tablespoons of cream cheese or mayonnaise.
4. Ensure Even Distribution: The key to a well-mixed filling is to ensure that every bite is packed with flavor. Make sure the chicken, vegetables, and cheese are well incorporated, so you achieve a balanced flavor profile in each sandwich.
Assembling the Sandwich
With your filling complete, it’s time to assemble the Cheesy Chicken Garlic Bread Sandwiches. The assembly process is crucial for achieving a delicious and visually appealing result.
1. Prepare the Bread: Start with your choice of garlic bread. If you’re using pre-made garlic bread, simply slice it in half lengthwise. For homemade garlic bread, spread softened butter mixed with minced garlic and parsley over the cut sides of the bread.
2. Spread the Filling: Take your prepared filling and spread it evenly over the bottom half of the garlic bread. Use a spatula to ensure even coverage, reaching all the corners. This helps each bite contain a delightful mix of chicken, peppers, and cheese.
3. Layering for Flavor: If desired, sprinkle an additional layer of cheese over the filling before placing the top half of the bread on. This step not only adds an extra cheesy touch but also helps bind the sandwich together.
4. Close the Sandwich: Gently place the top half of the garlic bread over the filling, pressing down slightly to secure everything in place.
Baking Instructions
Baking your sandwich correctly is vital to achieving that perfect crispy exterior while ensuring the cheese is melted and gooey inside.
1. Preheat the Oven: Preheat your oven to 375°F (190°C). A preheated oven ensures that your sandwich cooks evenly and achieves that desired crispiness.
2. Wrap the Sandwich: For optimal results, wrap the assembled sandwich in aluminum foil. This will help it retain moisture while the cheese melts. You can remove the foil for the last 5-10 minutes of baking to allow the bread to crisp up further.
3. Bake: Place the wrapped sandwich on a baking sheet and bake for 15-20 minutes. After this time, carefully unwrap the sandwich and bake for an additional 5-10 minutes to achieve a golden-brown finish.
4. Check for Doneness: The sandwich is ready when the cheese is fully melted and the bread is crispy. Keep an eye on it to avoid over-browning.
Serving Suggestions
Now that your Cheesy Chicken Garlic Bread Sandwich is baked to perfection, consider the following serving suggestions to elevate your meal.
1. Pairing with Sides: This sandwich pairs beautifully with a variety of sides. Consider serving it alongside a fresh garden salad dressed with a light vinaigrette, crispy French fries, or a comforting bowl of tomato soup. Each of these sides complements the rich flavors of the sandwich.
2. Variations for Different Tastes: Feel free to get creative with your sandwich. For those who enjoy a little heat, adding sliced jalapeños or banana peppers can spice things up. Alternatively, switch out the cheeses for something unique, like pepper jack for a kick or gouda for a smoky flavor.
3. Presentation Tips: To make your sandwich visually appealing, consider cutting it diagonally before serving. This not only makes it easier to handle but also showcases the colorful filling. Serve on a wooden or slate board, garnished with fresh herbs for a rustic touch.
Nutritional Information
Understanding the nutritional content of your Cheesy Chicken Garlic Bread Sandwich can help you make informed choices.
1. Nutritional Breakdown: On average, one sandwich contains approximately 450-550 calories, depending on the ingredients used. This includes protein from the chicken and cheese, carbohydrates from the bread, and healthy fats from the olive oil and butter.
2. Healthier Substitutions: For a lighter version, consider using whole grain or sprouted grain garlic bread. You can also opt for low-fat cheese or Greek yogurt in place of mayonnaise to reduce calories while still enjoying the flavors.
Conclusion
The Cheesy Chicken Garlic Bread Sandwich is an easy yet delicious meal that combines melty cheese, savory chicken, and flavorful sautéed vegetables, all enveloped in crispy garlic bread. Its versatility makes it suitable for various occasions, whether you are preparing a quick dinner, hosting a game day gathering, or packing a lunch for a picnic.
Encourage creativity by exploring different variations and personalizing the recipe to cater to your family’s preferences. This sandwich can easily become a family favorite, providing comfort and satisfaction with every bite. So gather your ingredients, follow these steps, and enjoy the mouthwatering experience of this delightful sandwich!
